I was 15 years old the first time I changed the oil in my Mitsubishi Eclipse. I had lowered the car so it was impossible to look under there! I found my dad’s car ramps and put them on our driveway. When I tried to drive up the front end of my car, I scraped the ramps and got stuck. My car was too low to the ground!
I had a solution though. I had to get some long boards to extend the runway of the ramps. My dad came out and watched as I drove up without any issues.
I finally got under the engine and changed the oil. It was a difficult process the first time. But once I knew what to do the second time was easier.
Why change your own oil?
The first time I changed my oil I wanted to do it to save money. I was a teenager that worked at a grocery store and didn’t have a lot of cash on hand. I wanted to save my money for car stereos and amplifiers!
Another reason is because it’s a simple and quick job. The steps are not complicated and you don’t need a lot of tools. You may already have most of the tools. The one negative part is that it’s easy to make a mess and your hands will get dirty. Get some rubber gloves. Problem solved!
You may want to save money or enjoy doing your own car work. I appreciate vehicles more when I get under the hood and do my own work. I love the satisfaction and enjoy the accomplishment of doing it myself.
You may be the same but everyone has their own reasons. Anyone can do this job at home!
Research what Oil you Need
The first item on the list is to find out what oil you need. Motor oil has different weights or viscosity depending on what the manufacturer recommends. Pull the manual out of your glove box and see what it says.
Mobil also has a great online resource.
Don’t forget to find out how much oil you need. Some engines can hold a gallon or more oil. Buy your oil and oil filter at your local auto parts store or check online.
Gather your supplies
Once you’ve found out what type of oil you need get everything together:
- Correct weight and right amount of new oil
- New oil filter
- Oil filter wrench
- Wrench to remove the drain plug
- Oil drain pan or a couple milk jugs with the top cut off
- Jack or ramps to lift the vehicle
- Wheel chocks for securing
- Old rags for cleaning
Lift the Vehicle
This step depends on the type of vehicle you’re working on. There’s no need for this step if there’s enough clearance to get underneath a truck. This might not be possible on a sedan. In that case you’ll need to jack up the front end or use car ramps.
If you have car ramps, put them on a level surface and drive up the rams until you feel you’re at the top. Put the car in park, turn off the engine, and engage the emergency brakes.
If you are going to lift the car with a jack, first make sure the car is on a level surface. You never want to lift a car on an uneven surface because it could roll or tip over if you make a mistake. Next, make sure the car is in park and the emergency brake is on.
Always use a wheel chock when lifting the car. Put two chocks behind the rear wheels. You should also use jack stands in case the jack fails. Jack stands will catch the car from falling if the jack fails.
Lift the vehicle high enough to work under.
Drain oil
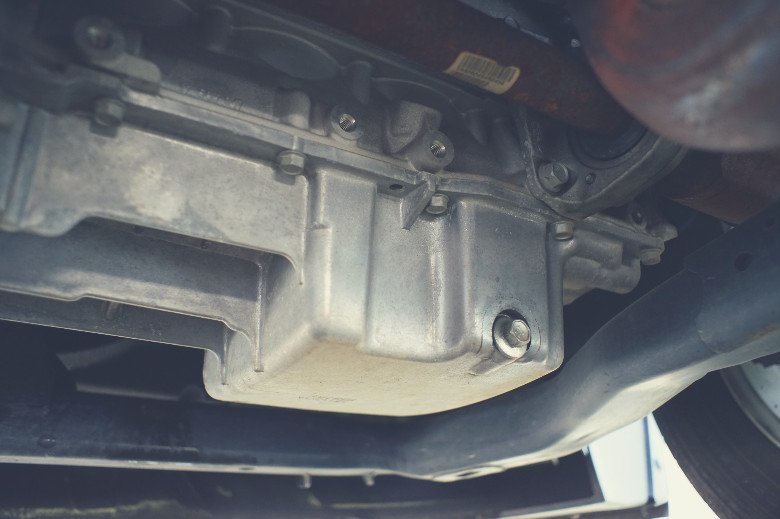
Inspect the bottom of the engine. Look for a drain plug which is on the bottom of the oil pan. Position your oil drain pan directly underneath to catch the oil. Get your wrench and slowly unscrew it. Be careful and hold on to the drain plug when you get to the end. You don’t want to have to find the plug in the oil!
Wait a few minutes for everything to finish draining and replace the plug.
Notice the black color of the oil. Wear and tear of the engine turns the oil black. This means the oil is doing it’s job! Compare it to the color of the new oil you add to see the difference.
Remove old filter
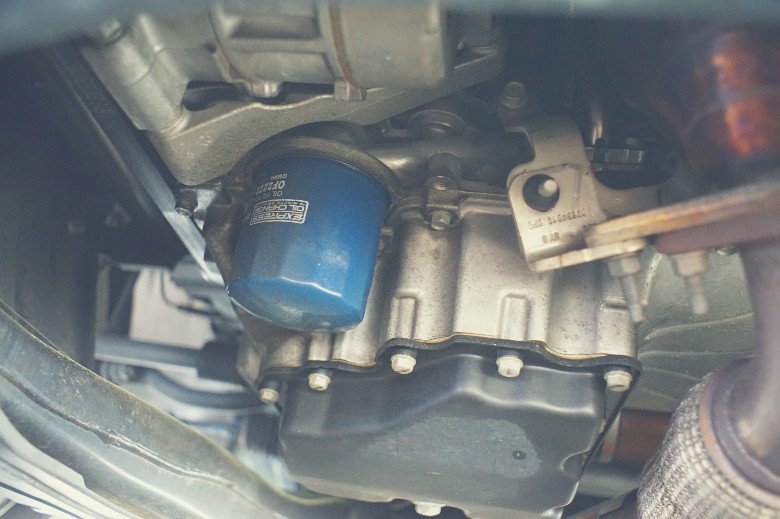
Most cars will have the oil filter nearby. Look around for a small round canister if you don’t see it immediately. Take your oil filter wrench and unscrew it. It shouldn’t be very tight. You may want to use your hands once it’s moving. Remove it completely.
Install New Filter
Open the box, take out the filter, and rub some oil on the O-ring to help make a good seal. Screw on the new filter and get it hand tight. You don’t want to over tighten, so make sure you read what it says on the new filter box. Take the filter wrench and tighten to what the manufacturer says.
Add New Oil
Now you’ve got the new filter and drain plug back on. It’s time to add the new oil.
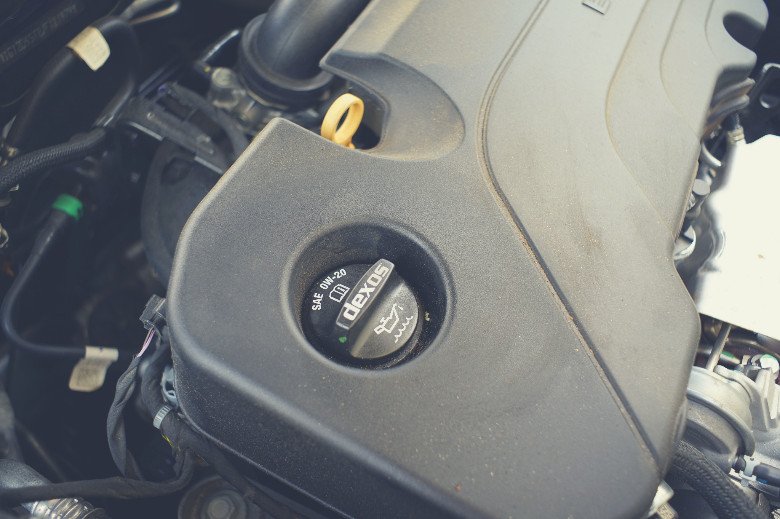
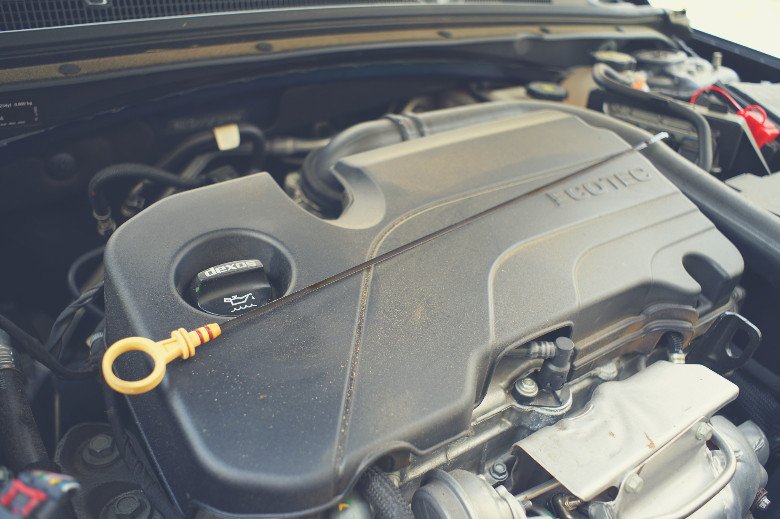
Find the oil cap under the hood. Look for a black cap with a small image of an oil can. Put your funnel in and add your first quart of oil. Don’t pour too fast. You’ll need to pour slowly as the oil drains through the funnel.
Keep track of how much you’re putting in because you don’t want to over fill it. Fill to what the manufacturer recommends. Look for any oil you may have spilled. Replace the cap and clean up the engine bay.
Lower Car
Remove the wheel chocks. If you used ramps, back the car down.
If you jacked the car, remove the jack stands. Carefully lower the car with the jack. Slow and steady.
If you did have to start the car you’ll want to let it sit for a few minutes before checking the oil. This allows the oil to settle and gives you an accurate measurement.
Check Oil Level and Leaks
Locate the dipstick in the engine bay. It’s a small handle connected to a long rod. The rod extends all the way to the crankcase to measure the oil level.
Pull the dipstick out and clean it off with a rag. Examine the end of the dipstick and find the indicator. You’ll see a minimum and maximum level. You want to be right in the middle.
Put the dipstick back in a push all the way. Now take it back out and look at the level again. It’s best to check a second time to get a clean reading.
Double check the area underneath and make sure you don’t have any leaks. Clean up your work area and you are done!
Record Mileage
Most auto shops will put a sticker on the corner of your windshield. This serves as a reminder when to change your oil next. You’ll want to do the same so you don’t forget when to change it next.
Write down the date and mileage in a log book and keep it in your glove box. You can also start a new note on your phone and write the date and mileage.
Safe Disposal
It’s best to recycle old oil. You don’t want to harm any wildlife or nature by disposing of old oil in your yard or sewer.
The easiest way is to call local auto parts stores. Most have a recycling program. Make a few calls and see if they accept used oil to recycle.
Summary
That wasn’t too bad! Once you’ve learned how to change your oil it’s easy to do on almost any car. Newer cars may look different. The oil filter and drain plugs may be in different places but the steps are still the same. You may also find brush guards or plates on the bottom of the car.
Now you can add one more skill to your repertoire! You may have gotten a little dirty but this is a quick and easy job you can do at home. It’s worth the effort and you’ll save a little money!